How to Make Oreo Dirt Cake in 5 Steps
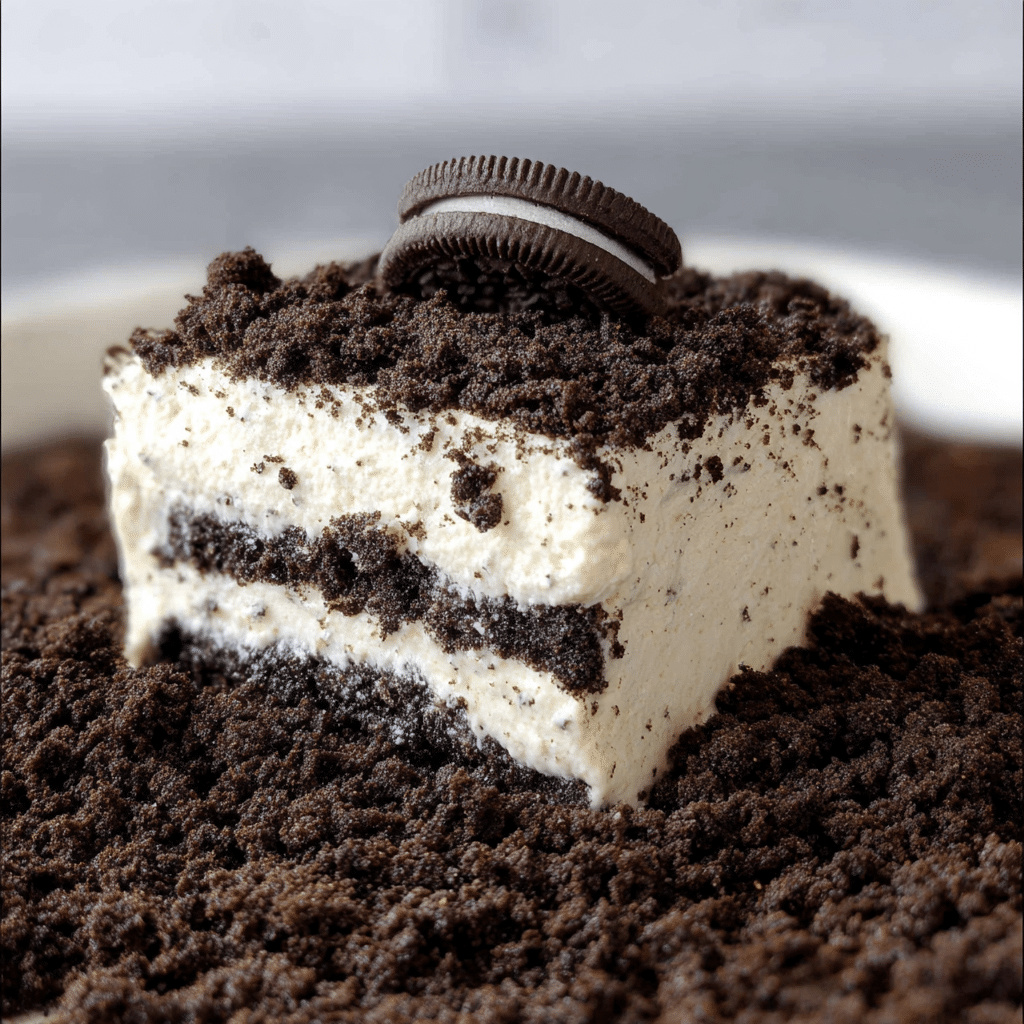
If you’re craving a dessert that’s creamy, chocolatey, and downright irresistible, then this Oreo Dirt Cake is your new best friend. Learn how to make Oreo Dirt Cake in 5 easy steps for a dessert that’s simple, quick, and guaranteed to bring smiles to everyone’s face. With luscious layers of whipped cream, cream cheese, and crushed Oreos, this treat combines texture and flavor in a way that feels like childhood nostalgia with a gourmet twist.
Why You’ll Love This Recipe
- Effortless Delight: Coming together in under 30 minutes, this recipe requires minimal prep and no oven time.
- Kid-Friendly Fun: It’s a perfect treat to prepare with children thanks to its easy layering steps and playful presentation.
- Rich and Creamy Texture: The combination of cream cheese and whipped topping creates a velvety smooth bite.
- Customizable Layers: You can add or swap ingredients for dietary needs without losing that signature dirt cake vibe.
- Perfect for Parties: Whether it’s a birthday or casual get-together, this crowd-pleaser is always a hit.
Ingredients You’ll Need
The beauty of Oreo Dirt Cake lies in its simple yet essential ingredients. Each element plays a crucial role—Oreos deliver crunch and chocolate flavor, while the cream cheese mixture provides the creamy richness that makes this dessert unforgettable.
- Oreo Cookies: Use classic Oreos, roughly crushed for a crunchy topping and layered texture.
- Cream Cheese: Provides tangy richness that balances the sweetness beautifully.
- Instant Pudding Mix: Vanilla or chocolate options add body and extra flavor to the creaminess.
- Milk: Needed to blend the pudding mix smoothly.
- Cool Whip or Whipped Topping: Adds light, airy texture to the dessert layers.
- Powdered Sugar: Sweetens and stabilizes the cream cheese mixture.
Variations for Oreo Dirt Cake
One of the best things about Oreo Dirt Cake is how easy it is to tweak and personalize. Whether you want to keep it classic or add your signature twist, these variations make it adaptable for any occasion or preference.
- Gluten-Free Version: Substitute with gluten-free sandwich cookies to keep it safe without losing crunch.
- Peanut Butter Twist: Swirl in creamy peanut butter with the cream cheese mixture for a nutty surprise.
- Chocolate Hype: Use chocolate pudding mix and chocolate Oreos for an ultra-chocolatey experience.
- Fruity Addition: Add sliced strawberries or raspberries between layers for freshness and color.
- Vegan Adaptation: Swap cream cheese and whipped topping for dairy-free alternatives to suit plant-based diets.

How to Make Oreo Dirt Cake
Step 1: Crush the Oreos
Start by placing your Oreos in a large zip-top bag and crush them using a rolling pin or heavy skillet. Aim for mostly small pieces with some larger chunks for texture. Set aside about one cup of the crushed Oreos for garnishing the top later.
Step 2: Prepare the Pudding Mix
In a medium bowl, whisk together the instant pudding mix with the cold milk, following the package instructions. Whisk until the pudding is slightly thickened but not fully set, then set aside to firm up while you work on the cream cheese mixture.
Step 3: Make the Cream Cheese Mixture
In a large mixing bowl, beat softened cream cheese with powdered sugar until smooth and fluffy. Gently fold in the prepared pudding mix and finally the whipped topping to create a light, creamy filling perfect for layering.
Step 4: Layer the Oreo Dirt Cake
In your serving dish or individual cups, start with a layer of the crushed Oreos, then spread a layer of the cream cheese mixture on top. Repeat the alternating layers until you reach the top of the dish, finishing with the reserved Oreo crumbs for garnish.
Step 5: Chill and Serve
Refrigerate the Oreo Dirt Cake for at least 4 hours, or overnight for best results. Chilling helps the flavors marry and the texture set, turning it into that perfectly creamy, “dirt-like” dessert that everyone will adore.
Pro Tips for Making Oreo Dirt Cake
- Use Cold Ingredients: For the pudding and whipped topping, use them straight from the fridge to achieve the best consistency.
- Don’t Over-Crush Oreos: Leaving some larger chunks creates a better texture contrast with the creamy layers.
- Softened Cream Cheese: Make sure the cream cheese is softened at room temperature to avoid lumps in your mixture.
- Chill Longer: The longer you chill, the better the flavors develop and the cream firms up perfectly.
- Layer Evenly: Distribute the layers evenly for a beautiful presentation and a balanced bite every time.
How to Serve Oreo Dirt Cake
Garnishes
Top your Oreo Dirt Cake with extra crushed Oreos, a sprinkle of mini chocolate chips, or even edible flowers for a fun and festive look. Fresh berries can also add a vibrant contrast.
Side Dishes
This dessert pairs wonderfully with simple sides like fresh fruit salad or a scoop of vanilla ice cream to balance its richness. A cup of coffee or cold milk makes a classic companion drink.
Creative Ways to Present
Serve Oreo Dirt Cake in individual mason jars for cute, portable treats, or layer it in a clear trifle bowl to show off the contrasting layers for parties. Adding crushed cookies on serving spoons adds extra charm and crunch.
Make Ahead and Storage
Storing Leftovers
Cover the Oreo Dirt Cake tightly with plastic wrap or a lid and store in the refrigerator. It keeps well for up to 4 days while maintaining its creamy consistency.
Freezing
If you want to store it longer, freeze the dessert in an airtight container for up to 2 months. Thaw in the refrigerator overnight before serving to preserve texture.
Reheating
Since Oreo Dirt Cake is best served cold, reheating is not recommended. Allow frozen portions to fully thaw in the fridge for the best texture and flavor experience.
FAQs
Can I use another brand of sandwich cookie besides Oreos?
Yes! While Oreos give this dirt cake its signature flavor, other sandwich cookies with cream filling can work, but the taste and texture will vary slightly.
Do I have to use instant pudding mix?
Instant pudding mix helps thicken the filling quickly for that smooth texture, but you can try homemade pudding recipes if preferred.
Is this dessert suitable for a crowd?
Absolutely! Double or triple the recipe and layer it in a large trifle bowl to serve many guests easily.
Can I make this recipe ahead of time?
Yes, making Oreo Dirt Cake a day ahead allows the flavors to meld and gives you a stress-free dessert ready when you are.
What’s the best way to crush Oreos for this recipe?
Using a rolling pin inside a sealed plastic bag gives great control for crushing Oreos to your desired size without making a mess.
Final Thoughts
This Oreo Dirt Cake is a must-try for any dessert lover searching for a quick, creamy, and chocolate-packed treat that feels like pure comfort in every bite. With just a handful of simple ingredients and easy steps, you can whip up a crowd-pleaser that’s as fun to make as it is to eat. Give it a go—you might just find your new favorite go-to dessert!
Related Posts
- Why Delicious Caramel Toffee Crunch Cake Delights
- Why Reese’s Peanut Butter Banana Bread Is Irresistible
- Why Strawberry Cheesecake Dump Cake is a Must-Try
Oreo Dirt Cake
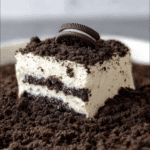
This Oreo Dirt Cake is a creamy, chocolatey dessert that combines crushed Oreo cookies, cream cheese, instant pudding, and whipped topping in luscious layers. Easy to prepare in under 30 minutes with no baking required, this nostalgic treat is perfect for parties, kid-friendly fun, and customizable to suit various dietary needs.
- Prep Time: 15 minutes
- Cook Time: 0 minutes
- Total Time: 4 hours 15 minutes
- Yield: 8 servings 1x
- Category: Dessert
- Method: No Bake
- Cuisine: American
- Diet: Gluten Free (with gluten-free cookie substitution)
Ingredients
Core Ingredients
- 2 packages (14.3 oz each) Oreo Cookies, roughly crushed
- 8 oz cream cheese, softened
- 1 package (3.4 oz) instant pudding mix (vanilla or chocolate)
- 2 cups cold milk
- 8 oz Cool Whip or whipped topping, thawed
- 1/2 cup powdered sugar
Instructions
- Crush the Oreos: Place Oreo cookies in a large zip-top bag and crush them using a rolling pin or heavy skillet until you have mostly small pieces with some larger chunks for texture. Set aside about 1 cup of the crushed Oreos for garnish later.
- Prepare the Pudding Mix: In a medium bowl, whisk together the instant pudding mix and cold milk according to the package instructions. Whisk until the pudding is slightly thickened but not fully set. Set aside to firm up while you prepare the cream cheese mixture.
- Make the Cream Cheese Mixture: In a large bowl, beat the softened cream cheese with powdered sugar until smooth and fluffy. Gently fold in the prepared pudding mix and then fold in the whipped topping to create a light, creamy filling perfect for layering.
- Layer the Oreo Dirt Cake: In your serving dish or individual cups, start with a layer of crushed Oreos. Spread a layer of the cream cheese mixture on top. Repeat alternating layers until the dish is full, finishing with the reserved Oreo crumbs on top for garnish.
- Chill and Serve: Refrigerate the assembled Oreo Dirt Cake for at least 4 hours, or overnight for best results. This chilling step helps the flavors meld and the texture set to the perfect creamy “dirt-like” consistency.
Notes
- Use cold ingredients (pudding mix and whipped topping) straight from the fridge for best consistency.
- Do not over-crush Oreos; leaving some larger chunks provides better texture contrast.
- Ensure cream cheese is softened at room temperature to avoid lumps in the mixture.
- Chill longer if possible to develop flavors and firm up the cream layers.
- Layer evenly for a balanced bite and beautiful presentation.
Nutrition
- Serving Size: 1 slice (about 1/8 of recipe)
- Calories: 350 kcal
- Sugar: 28 g
- Sodium: 220 mg
- Fat: 18 g
- Saturated Fat: 8 g
- Unsaturated Fat: 7 g
- Trans Fat: 0 g
- Carbohydrates: 42 g
- Fiber: 2 g
- Protein: 4 g
- Cholesterol: 30 mg
Keywords: Oreo Dirt Cake, no bake dessert, Oreo dessert, creamy chocolate dessert, easy layered cake, kid-friendly dessert