Easy No-Bake Oreo Dirt Cake for Sweet Cravings
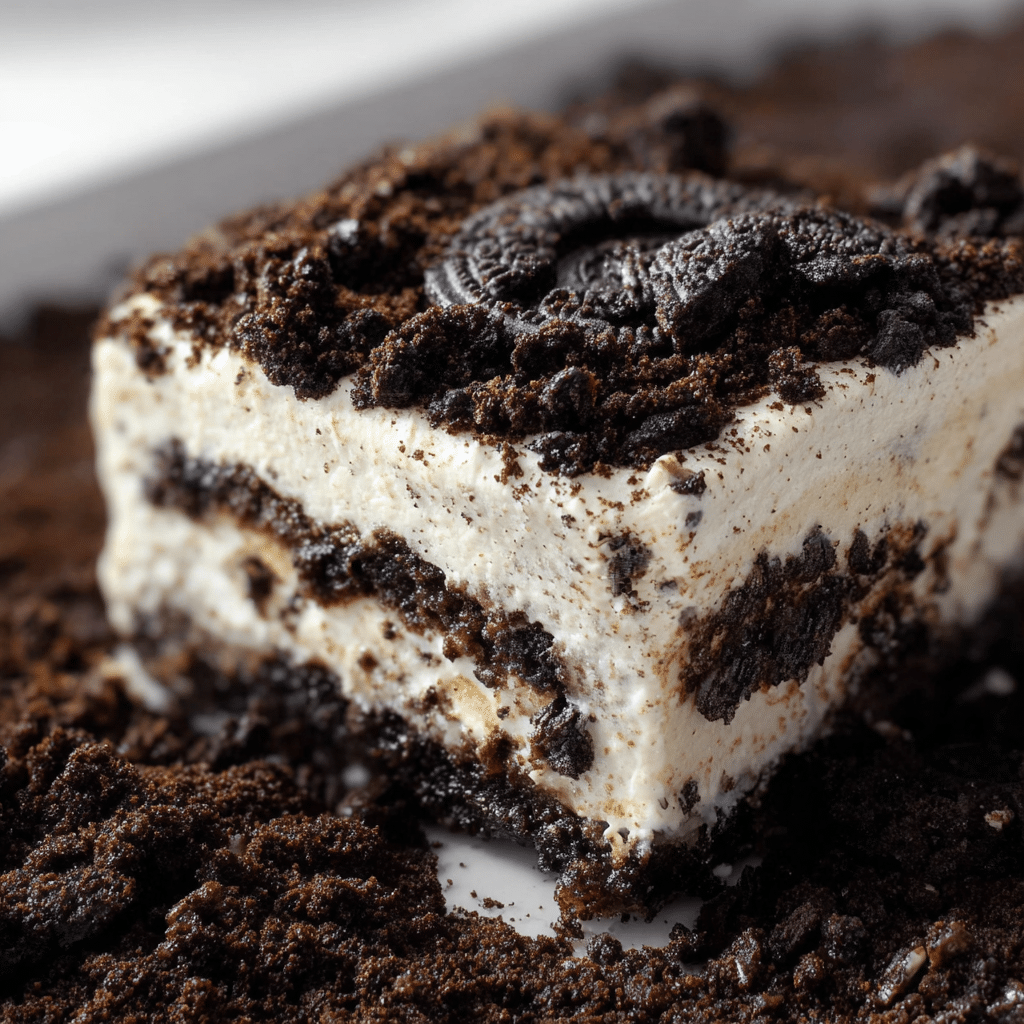
If you’re craving a dessert that’s quick, creamy, and irresistibly delicious, this No-Bake Oreo Dirt Cake is exactly what you need. Combining the nostalgic crunch of Oreo cookies with a rich, smooth pudding base, this dessert is delightfully simple to put together and perfect for any occasion. Whether you’re whipping it up for a party, a family night, or just a sweet treat for yourself, this No-Bake Oreo Dirt Cake will satisfy your sweet tooth and leave everyone asking for seconds.
Why You’ll Love This Recipe
- Effortless preparation: No baking or complicated steps means you can make this dessert in no time.
- Deliciously creamy texture: The pudding and cream cheese mixture creates a rich, smooth base.
- Kid-friendly and fun: The crushed Oreos give it a playful “dirt” appearance that’s both nostalgic and tasty.
- Customizable flavors: Easily add different toppings or mix-ins to suit your taste preferences.
- Great for gatherings: A crowd-pleaser that’s perfect for potlucks, celebrations, or casual dinners.
Ingredients You’ll Need
This No-Bake Oreo Dirt Cake recipe uses simple, everyday ingredients that come together seamlessly to create a dessert bursting with flavor and texture. Each ingredient plays a crucial role, from the crunchy Oreos that provide texture to the smooth pudding that brings all the flavors together.
- Oreo Cookies: For the signature “dirt” look and crunchy texture, use classic Oreo cookies crushed into small pieces.
- Pudding Mix: Instant vanilla or chocolate pudding powder adds creaminess and helps set the dessert.
- Milk: Essential for mixing with the pudding powder to create a smooth and creamy base.
- Cream Cheese: Adds a subtle tang and richness that balances the sweetness beautifully.
- Whipped Topping: Lightens the texture with a fluffy, airy touch making the cake irresistible.
- Sugar: Sweetens the cream cheese mixture just right to complement the Oreos.
Variations for No-Bake Oreo Dirt Cake
This No-Bake Oreo Dirt Cake is incredibly adaptable, letting you tailor it to your preferences or dietary needs. With just a few simple swaps or additions, you can create your own unique twist on this classic dessert.
- Chocolate Lovers’ Version: Use chocolate pudding instead of vanilla and add chocolate chips for an extra indulgence.
- Peanut Butter Twist: Incorporate a layer of creamy peanut butter between cookie layers for a salty-sweet combo.
- Fruit Infusion: Add fresh strawberries or bananas for a fruity contrast to the creamy base.
- Vegan Option: Use dairy-free pudding, plant-based cream cheese, and whipped topping alternatives to keep it vegan-friendly.
- Mini Parfaits: Layer the ingredients in small cups for individual servings perfect for parties.

How to Make No-Bake Oreo Dirt Cake
Step 1: Prepare the Cookie Crumbs
Begin by crushing the Oreo cookies into small pieces, leaving some chunks for texture. This will form the “dirt” layer, so make sure the crumbs are not too fine.
Step 2: Make the Pudding Mixture
Whisk the pudding mix with cold milk according to the package instructions until it thickens. This forms the creamy base of your dirt cake.
Step 3: Mix the Cream Cheese and Sugar
In a separate bowl, beat the softened cream cheese and sugar together until smooth and fluffy. This adds richness and a slight tang.
Step 4: Combine Whipped Topping and Cream Cheese
Fold the whipped topping gently into the cream cheese mixture. This will lighten the texture, making the dessert fluffy and smooth.
Step 5: Incorporate the Pudding
Carefully fold the pudding mixture into the cream cheese and whipped topping blend until fully combined. The mixture should be creamy and well-blended.
Step 6: Assemble the Dirt Cake
In a large glass dish, layer half of the Oreo crumbs, then spread half of the pudding mixture evenly over the crumbs. Repeat with the remaining Oreo crumbs and pudding mixture.
Step 7: Chill
Cover the dish with plastic wrap and refrigerate for at least 4 hours or overnight. This allows the flavors to meld and the dessert to set properly.
Pro Tips for Making No-Bake Oreo Dirt Cake
- Use chilled ingredients: Keep your cream cheese and whipped topping cold for easier mixing and better texture.
- Don’t over-mix: Gently fold ingredients to keep the mixture light and airy.
- Save some crumbs for topping: Sprinkle extra Oreo crumbs on top before serving for that classic dirt cake look.
- Let it chill long enough: Refrigerate the cake overnight if possible; it enhances flavor and texture.
- Use a clear dish: Show off the beautiful layers in a glass bowl or trifle dish for a stunning presentation.
How to Serve No-Bake Oreo Dirt Cake
Garnishes
Top your No-Bake Oreo Dirt Cake with extra crushed Oreos, edible candy worms for fun, chocolate shavings, or fresh berries to add color and texture.
Side Dishes
Serve this creamy dessert alongside simple vanilla ice cream, fresh fruit salad, or a scoop of your favorite sorbet to complement the rich flavors.
Creative Ways to Present
Try layering individual portions in mason jars or clear cups for cute, portable servings perfect for potlucks or picnics. You can also use cupcake liners to make Oreo dirt cake cups for a fun party treat.
Make Ahead and Storage
Storing Leftovers
Store any leftover No-Bake Oreo Dirt Cake covered tightly in the refrigerator to keep it fresh for up to 4 days without losing its creamy texture.
Freezing
This dessert freezes well if you want to keep it longer; freeze in an airtight container for up to 1 month. Thaw overnight in the fridge before serving.
Reheating
Since this is a cold dessert, avoid reheating; simply allow frozen portions to thaw in the fridge for best texture and flavor.
FAQs
Can I use a different cookie instead of Oreos?
Absolutely! While Oreos are classic, you can substitute with chocolate sandwich cookies or other crunchy cookies of your choice for a different twist.
Is this dessert gluten-free?
Traditional Oreos contain gluten, so for a gluten-free option, look for gluten-free sandwich cookies and pudding mixes labeled gluten-free.
How long does the No-Bake Oreo Dirt Cake need to chill?
It’s best to chill the cake for at least 4 hours, but overnight chilling ensures the pudding sets perfectly and flavors meld beautifully.
Can I make this dessert ahead of time?
Yes! This No-Bake Oreo Dirt Cake is a fantastic make-ahead dessert that can be prepared a day in advance, making it ideal for busy schedules.
What’s the best way to crush the Oreos?
Place the cookies in a sealed plastic bag and gently crush them with a rolling pin or pulse a few times in a food processor until you get a mix of crumbs and small chunks.
Final Thoughts
If you’re looking for a dessert that’s quick, crowd-pleasing, and downright delicious, this No-Bake Oreo Dirt Cake is a must-try. With its creamy pudding base, tangy cream cheese, and crunchy Oreo layers, it’s a fun and satisfying treat that will become a favorite in your dessert rotation. Grab those Oreos and get mixing—you’ll be hooked after just one bite!
Related Posts
- Why Orange Ginger Honey Loaf Cakes Delight Tastebuds
- How to Make Blueberry Crumble Cheesecake Perfectly
- Irresistible Red Velvet Brownies with Cream Cheese Frosting
No-Bake Oreo Dirt Cake
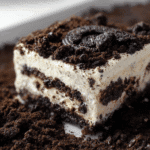
This No-Bake Oreo Dirt Cake is a quick, creamy, and irresistibly delicious dessert that combines crunchy Oreo cookies with a rich pudding and cream cheese base. Perfect for any occasion, it requires no baking and comes together effortlessly, making it a crowd-pleasing treat that’s fun, nostalgic, and fully customizable.
- Prep Time: 15 minutes
- Cook Time: 0 minutes
- Total Time: 4 hours 15 minutes (includes chilling time)
- Yield: 8-10 servings 1x
- Category: Dessert
- Method: No-Bake
- Cuisine: American
- Diet: Contains gluten (see notes for gluten-free option)
Ingredients
Cookies
- 24 classic Oreo cookies, crushed into small pieces (leaving some chunks for texture)
Pudding Mixture
- 1 package (3.4 oz) instant vanilla or chocolate pudding mix
- 2 cups cold milk
Cream Cheese Mixture
- 8 oz cream cheese, softened
- 1/2 cup granulated sugar
- 1 container (8 oz) whipped topping (such as Cool Whip), thawed
Instructions
- Prepare the Cookie Crumbs: Begin by crushing the Oreo cookies into small pieces, leaving some chunks for texture. This will form the “dirt” layer, so make sure the crumbs are not too fine.
- Make the Pudding Mixture: Whisk the pudding mix with cold milk according to the package instructions until it thickens. This forms the creamy base of your dirt cake.
- Mix the Cream Cheese and Sugar: In a separate bowl, beat the softened cream cheese and sugar together until smooth and fluffy. This adds richness and a slight tang.
- Combine Whipped Topping and Cream Cheese: Fold the whipped topping gently into the cream cheese mixture. This will lighten the texture, making the dessert fluffy and smooth.
- Incorporate the Pudding: Carefully fold the pudding mixture into the cream cheese and whipped topping blend until fully combined. The mixture should be creamy and well-blended.
- Assemble the Dirt Cake: In a large glass dish, layer half of the Oreo crumbs, then spread half of the pudding mixture evenly over the crumbs. Repeat with the remaining Oreo crumbs and pudding mixture.
- Chill: Cover the dish with plastic wrap and refrigerate for at least 4 hours or overnight. This allows the flavors to meld and the dessert to set properly.
Notes
- Use chilled ingredients to make mixing easier and improve texture.
- Gently fold ingredients to keep the mixture light and airy; don’t over-mix.
- Save some Oreo crumbs for topping and sprinkle them on just before serving.
- Refrigerate overnight if possible for best flavor and texture.
- Use a clear glass dish or trifle bowl to showcase the layers beautifully.
Nutrition
- Serving Size: 1 slice
- Calories: 350
- Sugar: 28g
- Sodium: 210mg
- Fat: 22g
- Saturated Fat: 11g
- Unsaturated Fat: 8g
- Trans Fat: 0.5g
- Carbohydrates: 35g
- Fiber: 1g
- Protein: 4g
- Cholesterol: 45mg
Keywords: No-Bake, Oreo, Dirt Cake, Dessert, Easy, Creamy, Pudding, Oreo Dessert, Party Dessert