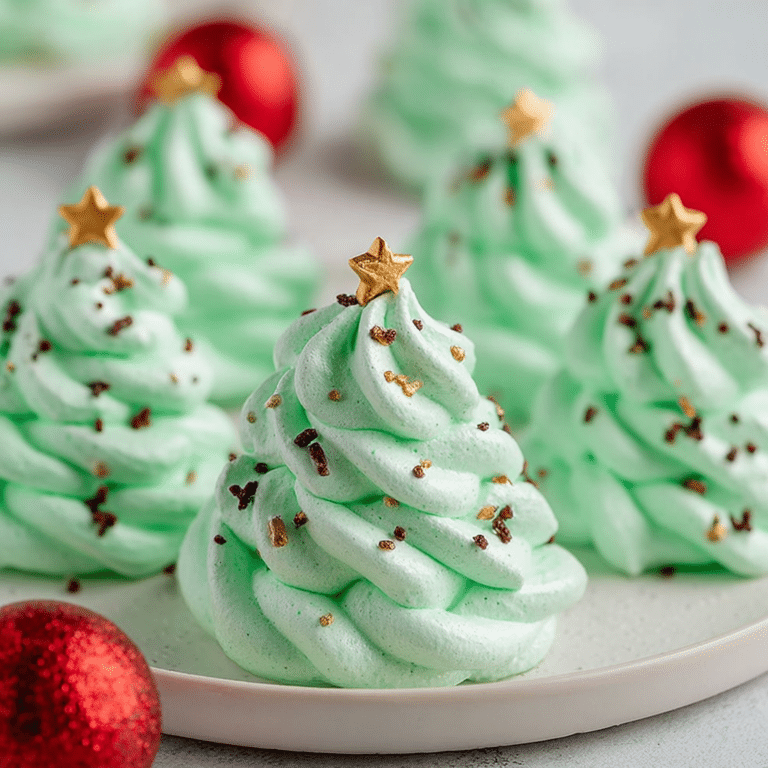
Christmas Chocolate Trees

If you’re looking to add a magical touch to your holiday celebrations, these Christmas Chocolate Trees recipes are exactly what you need. Perfectly festive and irresistibly delicious, these chocolate-based treats are a showstopper on any dessert table. Whether you prefer classic milk chocolate, rich dark chocolate, or vibrant colorful toppings, these 7 recipes will satisfy every sweet tooth and impress your holiday guests with delightful textures and eye-catching designs.
Why You’ll Love This Recipe
- Festive Appeal: The tree shape instantly brings holiday cheer to your table, making desserts part of your seasonal décor.
- Easy to Customize: These recipes are incredibly flexible, allowing you to swap ingredients and decorations to fit your taste.
- Perfect for Gifting: Create beautiful edible gifts that friends and family will adore and talk about long after Christmas.
- Kid-Friendly Fun: A great way to get little hands involved in holiday preparations with simple assembly and decorating steps.
- Rich, Decadent Flavor: Combining smooth chocolate with crunchy and creamy textures makes every bite heavenly.
Ingredients You’ll Need
With just a handful of simple ingredients, creating these Christmas Chocolate Trees is a breeze. Every component plays a crucial role in perfecting taste, texture, and festive flair.
- Chocolate Variety: Choose milk, dark, or white chocolate to melt and mold your tree base, customizing flavor and sweetness.
- Crackers or Cookies: Use sturdy wafers or pretzels to layer texture and build the tree structure.
- Sprinkles and Edible Decorations: Add colorful candies, sugar pearls, and edible glitter for whimsical holiday accents.
- Frosting or Ganache: Acts as glue to hold layers together while adding creamy richness.
- Optional Nuts and Dried Fruits: For added crunch and natural sweetness, perfect for texture contrast.
Variations for Christmas Chocolate Trees
Feel free to make these Christmas Chocolate Trees truly your own. Whether you want to suit dietary requirements or simply experiment with delicious twists, these adaptations are simple.
- Vegan Version: Use dairy-free chocolate and plant-based frosting to keep it allergy-friendly without sacrificing taste.
- Nut-Free Option: Skip nuts entirely and use crunchy seeds like pumpkin or sunflower for safe yet flavorful texture.
- Spiced Chocolate Trees: Add cinnamon, nutmeg, or chili powder into melted chocolate for a warming, seasonal kick.
- Gluten-Free: Opt for gluten-free cookies or rice cakes as your base for a safe holiday treat.
- Miniature Trees: Create bite-sized versions perfect for party trays and grab-and-go snacks.

How to Make Christmas Chocolate Trees
Step 1: Prep Your Ingredients
Gather and measure all ingredients before starting to melt your chocolate and prepare your decorations. Ensure cookies or crackers are broken into uniform shapes for balanced layering.
Step 2: Melt the Chocolate
Gently melt chocolate over a double boiler or in short bursts in the microwave, stirring frequently to avoid burning and ensure smooth consistency.
Step 3: Assemble the Layers
Dip each cracker or cookie piece into melted chocolate then stack them carefully in a tapered tree shape, adding frosting or ganache as adhesive between layers for stability.
Step 4: Decorate Your Trees
While the chocolate is still soft, sprinkle edible decorations, candies, or nuts evenly over the surface to create a festive, colorful appearance.
Step 5: Chill Until Set
Place completed trees in the refrigerator for 20-30 minutes or until the chocolate hardens completely, ensuring your creation holds form.
Pro Tips for Making Christmas Chocolate Trees
- Use Quality Chocolate: Higher quality chocolate melts better and provides richer flavor, enhancing your overall dessert experience.
- Room Temperature Ingredients: Ensure all components are at room temperature before assembly to avoid premature chocolate crystallization.
- Work Quickly: Melted chocolate can harden fast, so plan steps ahead and move swiftly during stacking and decorating.
- Support the Base: Use a sturdy plate or cardboard base covered with foil to keep your tree steady while it sets.
- Experiment with Heights: Vary layer sizes for a more natural and dynamic tree shape rather than uniform stacking.
How to Serve Christmas Chocolate Trees
Garnishes
Top your Christmas Chocolate Trees with powdered sugar “snow,” edible gold dust, or tiny fondant stars to make them shimmer and stand out on your holiday table.
Side Dishes
Complement these sweet treats with creamy holiday drinks like eggnog or rich hot chocolate, or serve alongside fresh fruit slices to balance richness.
Creative Ways to Present
Display your chocolate trees on rustic wooden platters, wrap individually in clear cellophane tied with festive ribbons, or arrange in a tiered dessert stand as a centerpiece.
Make Ahead and Storage
Storing Leftovers
Keep your Christmas Chocolate Trees in an airtight container at room temperature or in the fridge if your home is warm, preserving freshness and texture for several days.
Freezing
You can freeze the trees wrapped tightly in plastic wrap and stored in a sealed container for up to one month, then thaw in the fridge before serving.
Reheating
Avoid warming to keep the chocolate intact, but if needed, bring to room temperature gradually by moving from freezer to fridge, then to room air to prevent condensation damage.
FAQs
Can I use white chocolate for Christmas Chocolate Trees?
Absolutely! White chocolate melts and sets beautifully, offering a lovely base for colorful decorations.
How long do Christmas Chocolate Trees last?
Stored properly, they stay fresh for up to one week at room temperature and longer when refrigerated.
Are these recipes suitable for children to make?
Yes, with supervision during melting and assembly, kids will have a blast decorating and creating their own trees.
Can I make these gluten-free?
Definitely. Use gluten-free crackers or cookies as a base to keep these treats gluten-free without losing crunch.
What’s the best way to transport these for holiday parties?
Place cakes in sturdy containers and chill before traveling to prevent melting or breakage, then handle gently upon arrival.
Final Thoughts
These Christmas Chocolate Trees are a delightful blend of creativity, flavor, and festive spirit that bring joy to any holiday gathering. Whether you’re gifting them or sharing at your own celebration, each bite is a wonderful way to spread Christmas cheer. Dive into these recipes and make your holidays extra sweet and memorable!
Related Posts
PrintChristmas Chocolate Trees

Christmas Chocolate Trees are festive, customizable chocolate treats perfect for holiday celebrations. Made with layered crackers or cookies dipped in melted chocolate, held together with frosting or ganache, and decorated with sprinkles, nuts, and edible glitter, these delightful desserts are easy to assemble, fun for kids, and ideal for gifting or party tables.
- Prep Time: 15 minutes
- Cook Time: 10 minutes
- Total Time: 45 minutes
- Yield: 6-8 trees depending on size
- Category: Appetizers
- Method: No-bake
- Cuisine: Holiday / Christmas
- Diet: Gluten Free (if gluten-free crackers or cookies are used)
Ingredients
Chocolate Base
- Milk, dark, or white chocolate (amount as needed for melting and dipping)
Structure
- Crackers or sturdy cookies (wafer crackers, pretzels, gluten-free cookies or rice cakes for gluten-free option)
Adhesive
- Frosting or chocolate ganache (quantity as needed for layering)
Decorations
- Colorful sprinkles
- Sugar pearls
- Edible glitter
- Colorful candies
- Optional nuts (or crunchy seeds like pumpkin or sunflower seeds for nut-free version)
- Optional dried fruits
Instructions
- Step 1: Prep Your Ingredients Gather and measure all ingredients before starting. Break cookies or crackers into uniform shapes to ensure balanced and stable layering.
- Step 2: Melt the Chocolate Gently melt chocolate using a double boiler or microwave in short bursts, stirring frequently to prevent burning and achieve a smooth consistency.
- Step 3: Assemble the Layers Dip each cracker or cookie piece into the melted chocolate, then stack them in a tapered tree shape. Use frosting or ganache between layers as glue to hold the structure steady.
- Step 4: Decorate Your Trees While the chocolate is still soft, sprinkle edible decorations such as candies, sprinkles, nuts, or dried fruits evenly over the surface to create a festive look.
- Step 5: Chill Until Set Place the assembled trees in the refrigerator for 20-30 minutes, or until the chocolate hardens completely and the tree holds its shape firmly.
Notes
- Use high quality chocolate for better melting and richer flavor.
- Ensure all ingredients are at room temperature before assembly to prevent premature chocolate crystallization.
- Work quickly as melted chocolate hardens fast.
- Support the base during assembly with a sturdy plate or foil-covered cardboard.
- Experiment with varying layer sizes for a natural, dynamic tree shape.
Nutrition
- Serving Size: 1 tree
- Calories: 250-300 kcal
- Sugar: 20-25 g
- Sodium: 50-100 mg
- Fat: 15-20 g
- Saturated Fat: 8-12 g
- Unsaturated Fat: 5-8 g
- Trans Fat: 0 g
- Carbohydrates: 25-30 g
- Fiber: 2-3 g
- Protein: 3-5 g
- Cholesterol: 10-15 mg
Keywords: Christmas chocolate trees, holiday dessert, chocolate treat, festive dessert, no-bake dessert, gluten-free holiday treat, kid-friendly dessert